SQL Server enhancements in Data Services Manager version 9.1.1
 VMware introduced support for Microsoft SQL Server as a data service in VMware Data Services Manager version 9.1. In version 9.1.1, there are a number of enhancements, some of which I will highlight in this post. If you want to get the full list of enhancements, check out the VMware Data Services Manager 9.1.1. Release Notes. One of the major changes in version 9.1.1 is to enable the VCF Automation (VCFA) Provider Administrators to provision the SQL Server instances / engines directly from VCFA, rather than context switching back to the DSM UI to do it. Once the SQL Server instance is deployed, data service policies can be created to allow the tenant users in different organization to provision SQL Server databases on the SQL Server instances to which their organization has access.
Other enhancements include setting an AD user as the SQL Server admin rather than a SQL user, and support for gMSA – Group Managed Service Accounts – to perform group refreshes and group membership of users. The latter feature is interesting as gMSAs improves security. gMSAs automatically generating complex, 128-character passwords for the account and rotate it automatically every 30 days (by default). Using a gMSA in place of a normal AD account also get automatically granted permissions to manage its own Service Principal Names (SPNs). When the SQL Server engine starts, a gMSA can automatically register and unregister its SPN.
gMSA Support
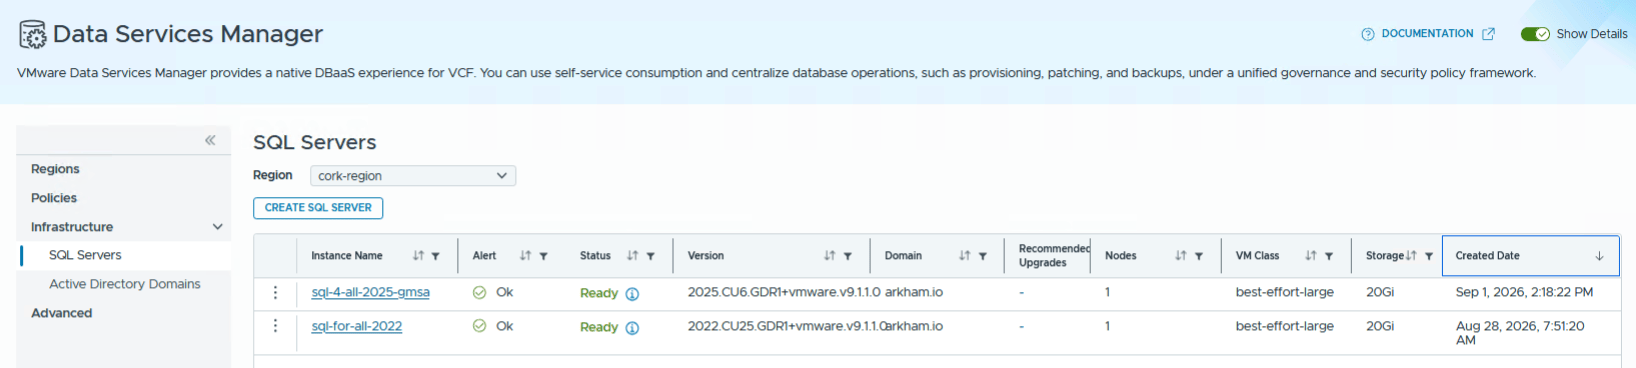
Let’s look at how to set up a gMSA account during the creation of a SQL Server Instance through VCFA in more detail. This first screenshot shows where to create the SQL Server instances in VCF Automation. When you are logged into VCFA as a Provider Admin, navigate to the VCF Services > Data Services Manager in the navigation toolbar on the left hand side. As you can see, the user experience has changed quite a bit from the previous release, so take some time to familiarise yourself with it.
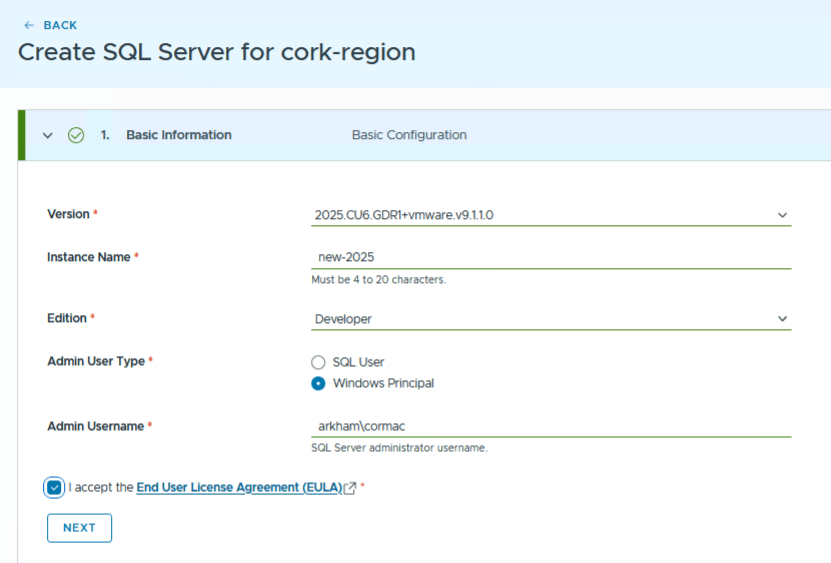
During the creation of a new SQL Server instance, you can now select to have a SQL user or an Active Directory user as the SQL Server administrator. If you choose a Windows Principal (AD user), provide the domain name as well as the user name, as shown below.
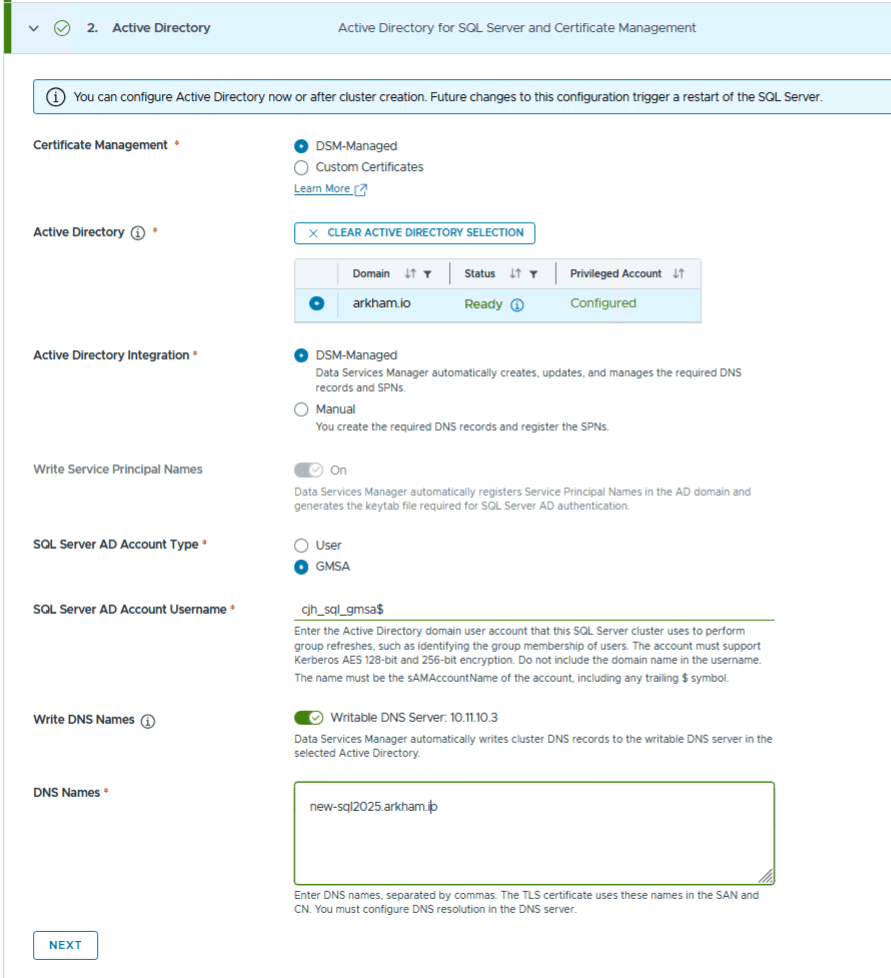
In the next section on Active Directory, a gMSA may be selected in place of an AD user account to handle database access. If gMSA is selected, then the AD Account Username must be populated with the gMSA ‘SamAccountName’. In many case, the SamAccountName has a trailing ‘$’ sign, and this must be included. gMSAs automatically have privileges to Write Service Principal Names so this field is automatically set to on as is not configurable. You can still use the account to Write DNS Names, but you must ensure that your privileged used added to the gMSA has this privilege in Active Directory.
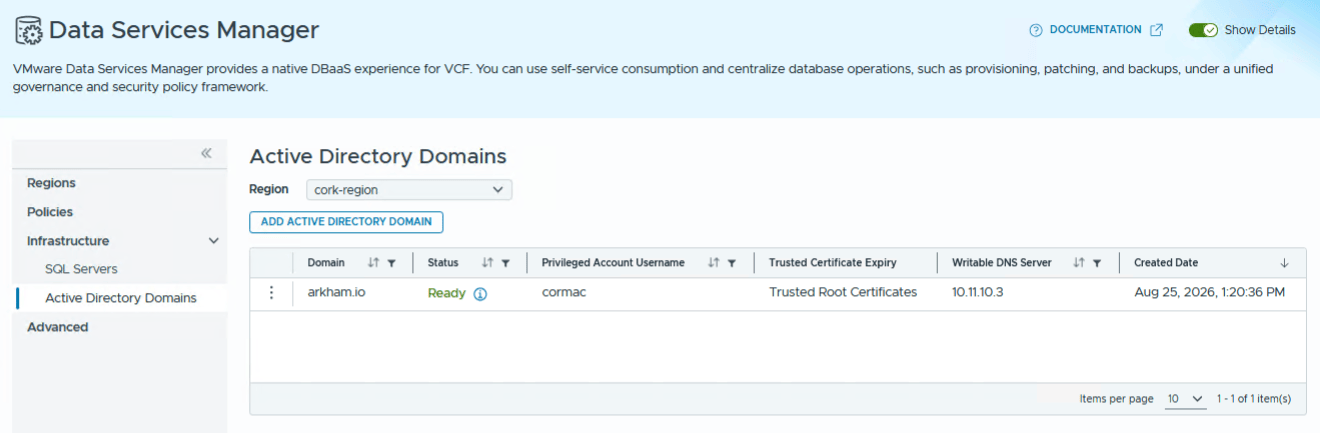
If you want to test gMSA, here are the steps that I followed to create such as account in my active directory. These were run from a PowerShell window which I had opened with ‘Run as Administrator’ privileges:
1. Check that a Key Distribution Service (KDS) Root Key exists
Active Directory requires a Key Distribution Service (KDS) Root Key to generate encrypted gMSA passwords. Check to see if one exists. If it does not, you will have to create one.
PS C:\Users\Administrator> Get-KdsRootKey

AttributeOfWrongFormat :
KeyValue               : {74, 163, 251, 83...}
EffectiveTime          : 3/13/2026 11:30:05 PM
CreationTime           : 3/14/2026 9:30:05 AM
IsFormatValid          : True
DomainController       : CN=ARKHAM-DC01,OU=Domain Controllers,DC=arkham,DC=io
ServerConfiguration    : Microsoft.KeyDistributionService.Cmdlets.KdsServerConfiguration
KeyId                  : 6b591c9e-7676-59cf-6d44-bb745f0040a0
VersionNumber          : 1
2. Create a Security Group
PS C:\Users\Administrator> New-ADGroup -Name "CJH-gMSA-Hosts" `
-GroupScope Global -GroupCategory Security
3. Create the gMSA Identity
Create the actual gMSA account in Active Directory and assign the group permission to access its credentials. Note that the DNS Hostname can be anything in the following command:
PS C:\Users\Administrator> New-ADServiceAccount -Name "cjh_sql_gmsa" `
-DNSHostname "cjh_sql_gmsa.arkham.io" `
-PrincipalsAllowedToRetrieveManagedPassword "CJH-gMSA-Hosts"
4. Check that it the group managed service account was created successfully:
PS C:\Users\Administrator> Get-ADServiceAccount -Identity "cjh_sql_gmsa"
DistinguishedName : CN=cjh_sql_gmsa,CN=Managed Service Accounts,DC=arkham,DC=io
Enabled           : True
Name              : cjh_sql_gmsa
ObjectClass       : msDS-GroupManagedServiceAccount
ObjectGUID        : 890010fb-1b49-47d4-b2dc-552dc64e9bc0
SamAccountName    : cjh_sql_gmsa$
SID               : S-1-5-21-388335747-1197595944-2956950382-1608
UserPrincipalName :

PS C:\Users\Administrator> (Get-ADServiceAccount -Identity "cjh_sql_gmsa" `
-Properties "msDS-GroupMSAMembership").'msDS-GroupMSAMembership'.access
ActiveDirectoryRights : GenericAll
InheritanceType       : None
ObjectType            : 00000000-0000-0000-0000-000000000000
InheritedObjectType   : 00000000-0000-0000-0000-000000000000
ObjectFlags           : None
AccessControlType     : Allow
IdentityReference     : ARKHAM\CJH-gMSA-Hosts
IsInherited           : False
InheritanceFlags      : None
PropagationFlags      : None
5. Add your privileged AD user to the list of Group Members
PS C:\Users\Administrator> Add-ADGroupMember-Identity "CJH-gMSA-Hosts" -Members "cormac"

PS C:\Users\Administrator> Get-ADGroupMember-Identity "CJH-gMSA-Hosts"

distinguishedName : CN=cormac,CN=Users,DC=arkham,DC=io
name: cormac
objectClass : user
objectGUID: b5a2bd65-8832-469b-b278-8fa2fa6fcaea
SamAccountName: cormac
SID : S-1-5-21-388335747-1197595944-2956950382-1602
6. Test the gMSA.
This command should return True. If there is a misconfiguration, this should report back the reason why.
PS C:\Users\Administrator> Test-ADServiceAccount -Identity "cjh_sql_gmsa"
True
The account is now ready to be used when provisioning SQL Server instances via DSM Manager.
Encrypted Backup and Transparent Data Encryption
I already mentioned some of these new SQL Server features in my DSM version 9.1.1 announcement post, but some are worth repeating here as I know a number of customers have requested them. We have now validated Backup Encryption and TDE, Transparent Data Encryption, on DSM provisioned SQL Server databases. Both features are available through the API. Encrypted Backups can be activated by adding a PFX file to the SQL Server instance specification. This PFX (Personal Information Exchange) file is password-protected and contains the SSL/TLS public key certificate and its matching private key. It is added to the spec.serverConfig.certificates of the SQL Server instance, and then referenced via spec.serverConfig.backupEncryptionCertificate. All databases created on the SQL Server instance will now have encrypted backups if this is configured. Note that if you wish to restore an encrypted database to a new SQL Server instance, the same certificate used to encrypt the backup must be imported onto the target SQL Server instance.
Transparent Data Encryption also requires adding a certificate to the specification of the SQL Server instance, spec.serverConfig.certificates, as seen previously. Then, on the user database, the db_owner (database owner) can use TSQL commands to create an encryption key. Finally, the db_owner can turn on encryption by performing ALTER DATABASE .. SET ENCRYPTION ON.
Summary
I haven’t discussed some other important improvements such as support for SQL Server 2025 and on-demand backup for SQL Server databases. However, as mentioned at the outset, you will find the full set of enhancements in the release notes linked above. I am sure you will agree that this release contains plenty of SQL Server enhancements for those customers wishing to provide SQL Server Database as a Service (DBaaS) to their on-premises VMware Cloud Foundation customers.
