Data Services Manager v2.0.2 available with new Aria Automation Integration
![]() Data Services Manager (DSM) version 2.0.2 is now available. Possibly the most eagerly anticipated feature associated with this release is a new set of DSM capabilities for Aria Automation. A new Custom Resource allows DSM PostgreSQL and MySQL databases to be provisioned from Data Services Manager via Aria Automation. If your organisation already uses Aria Automation and you are looking for a DBaaS (Database as a Service) solution, then you should definitely take a closer look. The engineering team has done a great job in making the deployment process of the Custom Resource as seamless as possible, and the README.md file included in the download bundle has step by step instructions on how to get started. In this post, I will show you in a bit more detail what the deployment process looks like. Once the Custom Resource is installed, we will look at some of the entities that are created in Aria Automation to enable seamless deployments of DSM databases via the Service Broker.
Data Services Manager (DSM) version 2.0.2 is now available. Possibly the most eagerly anticipated feature associated with this release is a new set of DSM capabilities for Aria Automation. A new Custom Resource allows DSM PostgreSQL and MySQL databases to be provisioned from Data Services Manager via Aria Automation. If your organisation already uses Aria Automation and you are looking for a DBaaS (Database as a Service) solution, then you should definitely take a closer look. The engineering team has done a great job in making the deployment process of the Custom Resource as seamless as possible, and the README.md file included in the download bundle has step by step instructions on how to get started. In this post, I will show you in a bit more detail what the deployment process looks like. Once the Custom Resource is installed, we will look at some of the entities that are created in Aria Automation to enable seamless deployments of DSM databases via the Service Broker.
Step 1: Download the Software Bundle
The bundle is available on Tanzu Net (network.pivotal.io) with the 2.0.2 DSM release. Download the zip, and extract it as there are some configuration steps needed before installation. Please refer to the README.md file mentioned previously, as this provides step by step instructions on how to deploy the Custom Resource. I’ve captured a portion of it below. I am using Visual Studio (VS) Code. Other IDEs are available.

Step 2: Check & Install Python Requirements
The deployment requires Python 3.10 or higher. It also requires a few Python libraries. These are detailed in requirements.txt file which is included in the download bundle. If you want to install these libraries in a single step, you could run the following command:
pip3 install -r requirements.txt
Step 3: Update the config.json with Aria and DSM details
Another requirement is to update the config.json file which is also in the bundle. This must be edited, and details such as your Data Services Manager FQDN/IP address and DSM credentials must be included. You will also need to add your Aria Automation URL, Org ID and Aria Automation credentials. A sample set of configuration settings are provided in the config.json for guidance, as shown here:
{
"dsm_hostname": "xx.xx.xx.xx",
"dsm_user_id": "provider@vmware.com",
"dsm_password": "VMwarexxxx",
"aria_base_url": "https://cava-x-xxx-xxx.eng.vmware.com",
"org_id": "6bfa9851-07a3-4f8e-9010-550b1a927c94",
"blue_print_name": "DSM DBaaS",
"abx_action_name": "DSM-DB-crud",
"cr_name": "DSMDB",
"cr_type_name": "Custom.DSMDB",
"aria_username": "XXXXXXX",
"aria_password": "VMXXXXXX",
"env_name": "DSM_ENV"
}
Step 4: Deploy the Custom Resource
Everything is now in place to install the DSM Custom Resource into Aria Automation. Run the following command to initiate the install process.
python3 aria.py
There will be a lot of output generated (200 & 201 message) as each of the objects required to integrate DSM with Aria Automation are created. However, once everything has been configured correctly in the config.json and the requirements are met (e.g., DSM 2.0.x and Aria Automation 8.14 or higher), the installation should succeed without error.
Step 5: Review newly created Aria Automation objects
As detailed in the README.md, there are a number of Aria Automation objects created to support the integration with Data Services Manager. In the Aria Automation Assembler, under Infrastructure, you will find a new project. By default, this is called DSM_Project, as per the projectID in aria.py. You can see the Templates, Deployments, Actions and Secrets associated with the project from the view below. (Note that there will be 0 deployments to begin – this screenshot is taken after a database has been provisioned in my environment).

Clicking on the number next to any of the objects in the project will bring you to the object in question. The Template, DSM_DBaaS, is found under Assembler > Design > Templates, and is shown below.
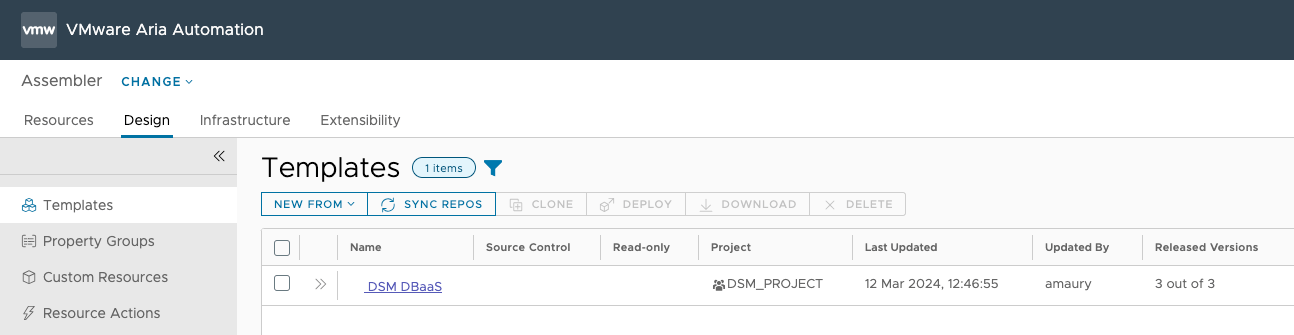
Clicking on the template name will open it and show you to the code where all of the inputs that need to be inputted to deploy a database can be found. We will see this in action shortly when we provision a database.
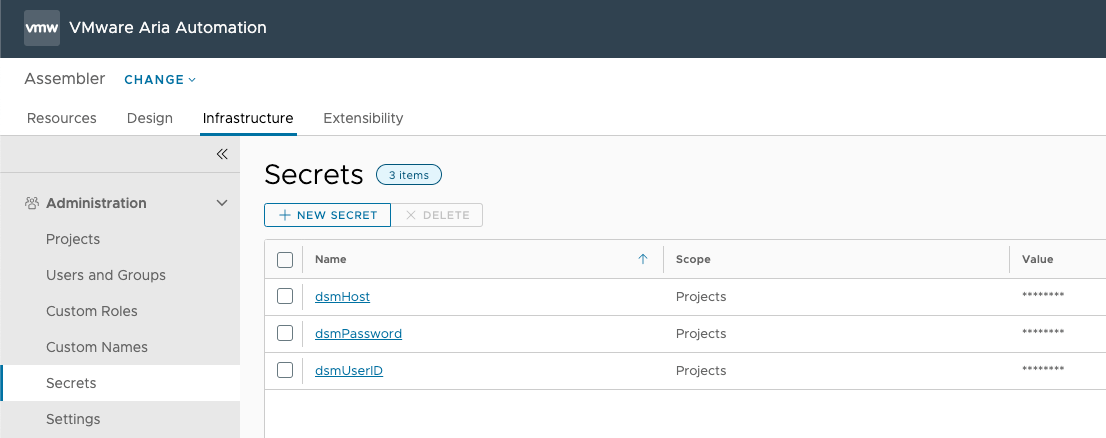
The environment built for the integration contains 3 environmental variables defined in the config.json, dsm_hostname, dsm_user_id and dsm_password. These appear as dsmHost, dsmPassword and dsmUserID. These properties are also created as secrets, which can be seen in the Infrastructure > Secrets view, as shown below.
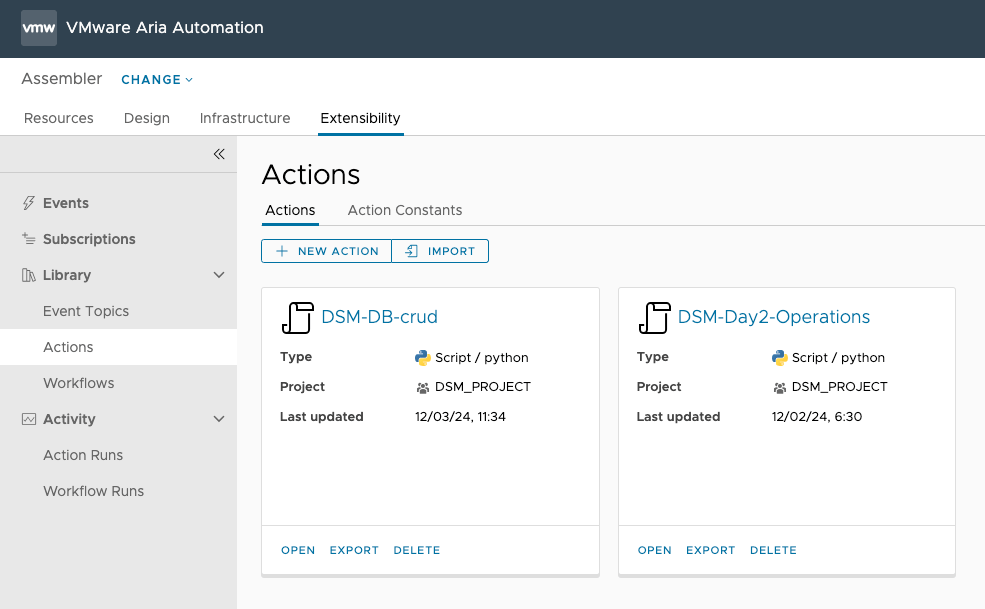
One final set of properties that might be interesting to look at are the Actions that can be found under Assembler > Extensibility > Library > Actions. Here you can see both the CRUD actions (Create, Read, Update, Destroy) as well as the Day 2 Operations action. If these actions are opened, you will see the Python code for each of the functions. These functions link directly to the Create, Read, Update and Destroy lifecycle actions found in Assembler > Design > Custom Resources > DSMDB.
Further details about the integration can be found in the README.md, but we will now move on and use the Custom Resource in Aria Automation to deploy a database via Data Services Manager 2.0.
Step 6: Provision a database from Aria Automation
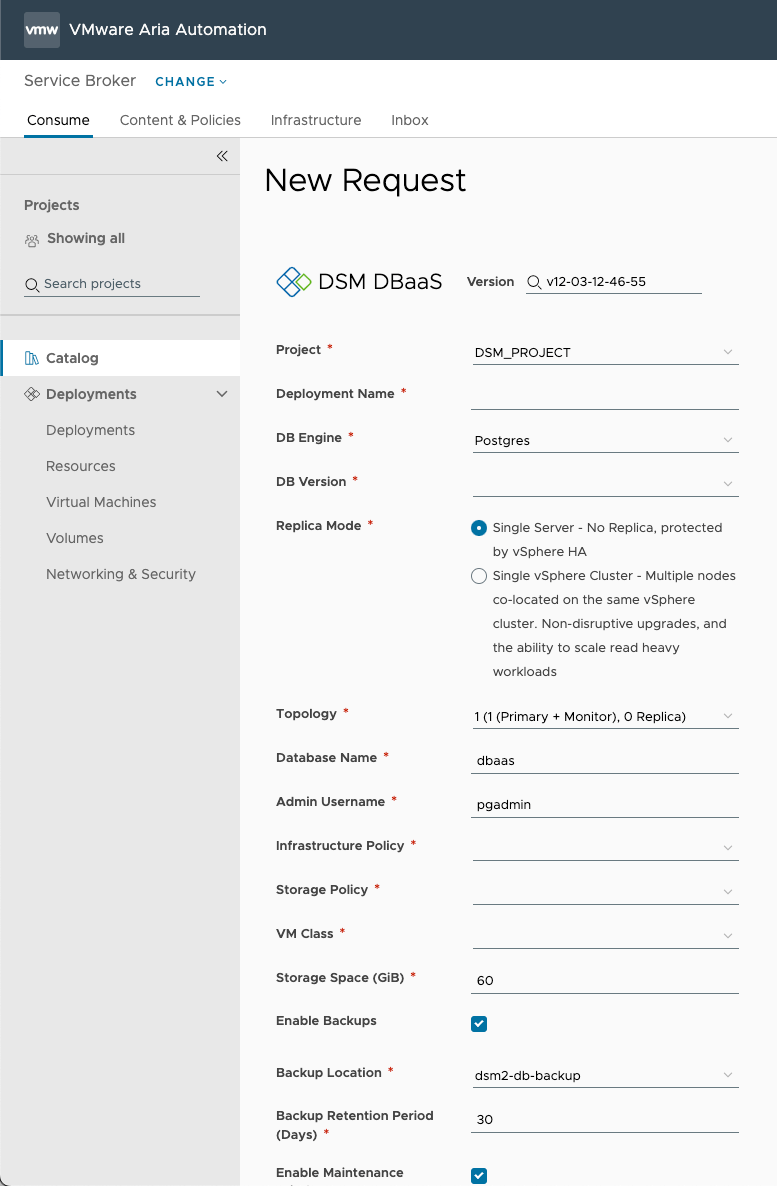
To provision a database, it is necessary to switch context from the Assembler in Aria Automation to the Service Broker. Looking at the Service Broker catalog, there is a new catalog item called DSM DBaaS, short for DataBase as a Service.

Click on the Request link in the DSM DBaaS Catalog item to provision a new database. Here is where the end user begins to populate information such as database engine, selecting the version of database, the topology (standalone or replicated), and of course the vSphere resources that the database will use. These resources are defined through the selection of an infrastructure policy which should already exist on your vSphere environment. More details on Infrastructure Policies can be found in this earlier blog post.
Note: If you begin to observe errors related to ‘form_dsminputs’ action after starting a new request, such as undefined topology.valueList, replicationmode.valueList, etc, it is most likely that you have not provided the correct login information for DSM. Revisit you config.json and address the error. Then follow the steps to remove the integration and reinstall.
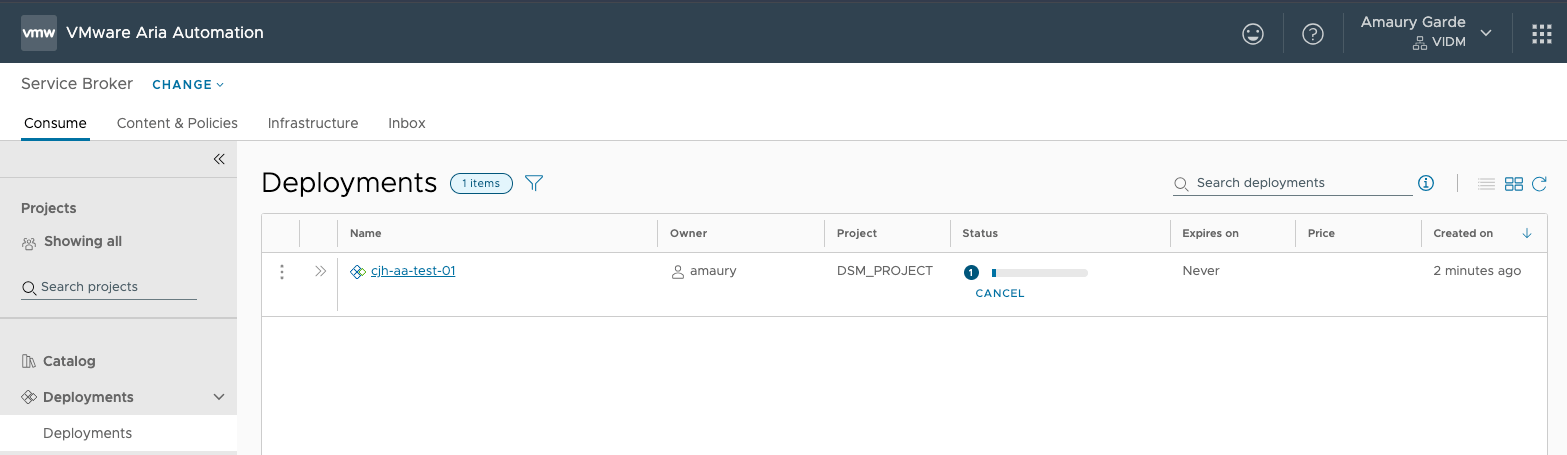
Once the request has been populated and submitted, the deployment progress can be observed from both Aria Automation and Data Services Manager. In the Service Broker, under Deployments, progress is visible as shown here:
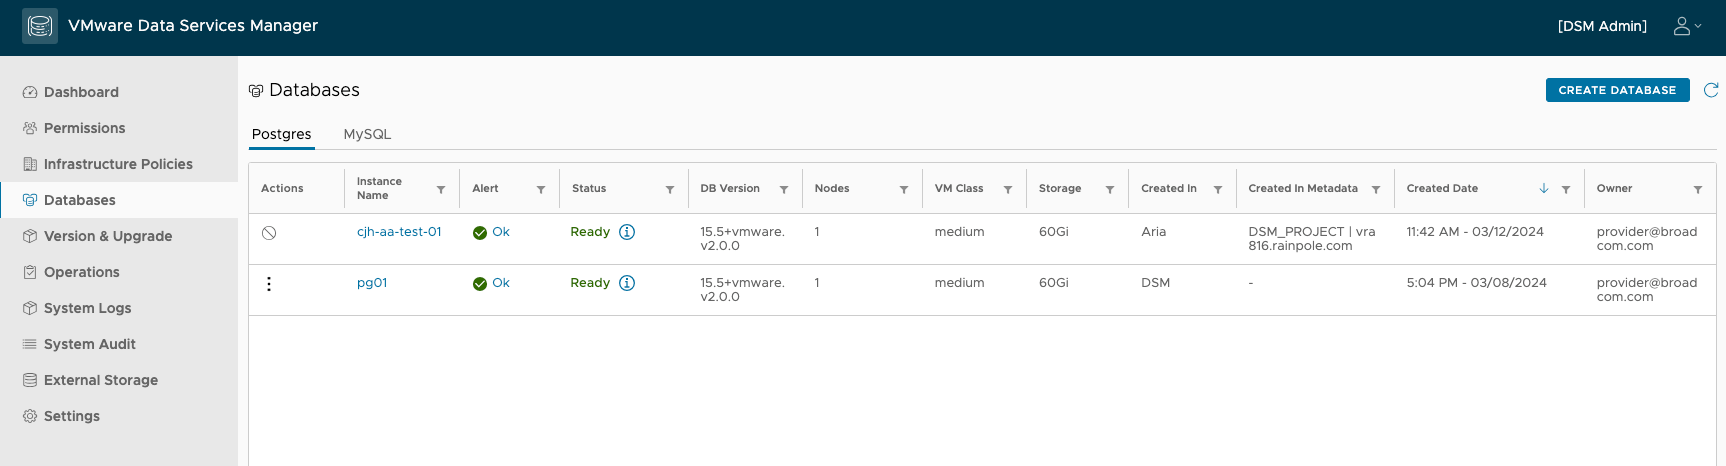
Similarly, in the DSM UI, under Databases, the deployment progress is also visible:

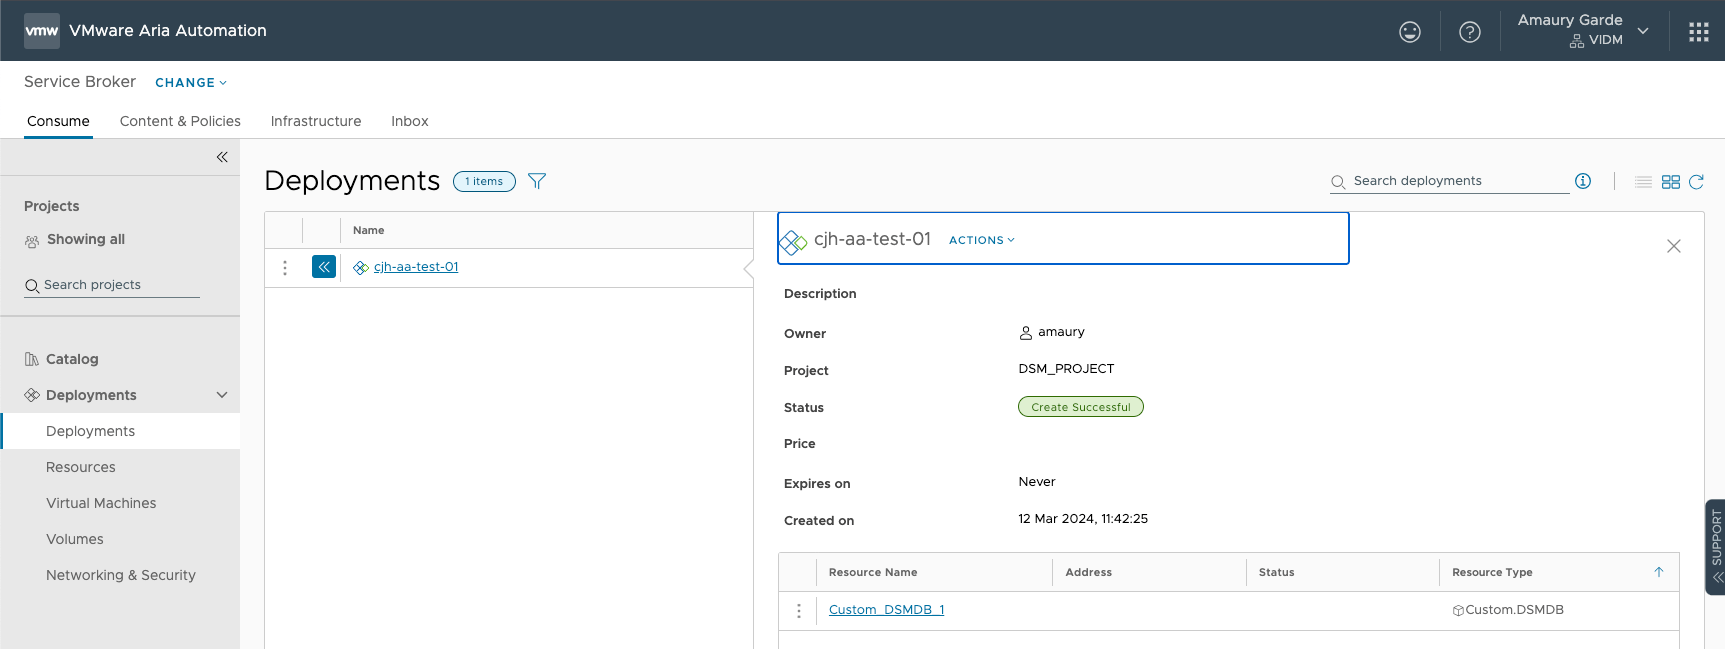
Assuming there are no issues, both the Deployment view in Service Broker and the DSM UI should report success.
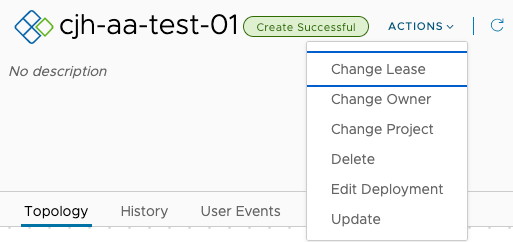
One thing to be aware of is that day 2 actions are disabled in the DSM UI for Aria Automation provisioned databases. Instead, these operations now appear in Aria Automation, under the Service Broker > Deployment > Actions. For example, if I wanted to modify the topology, or change the size of the database disk, I would select Update from the Actions drop-down list, shown here.
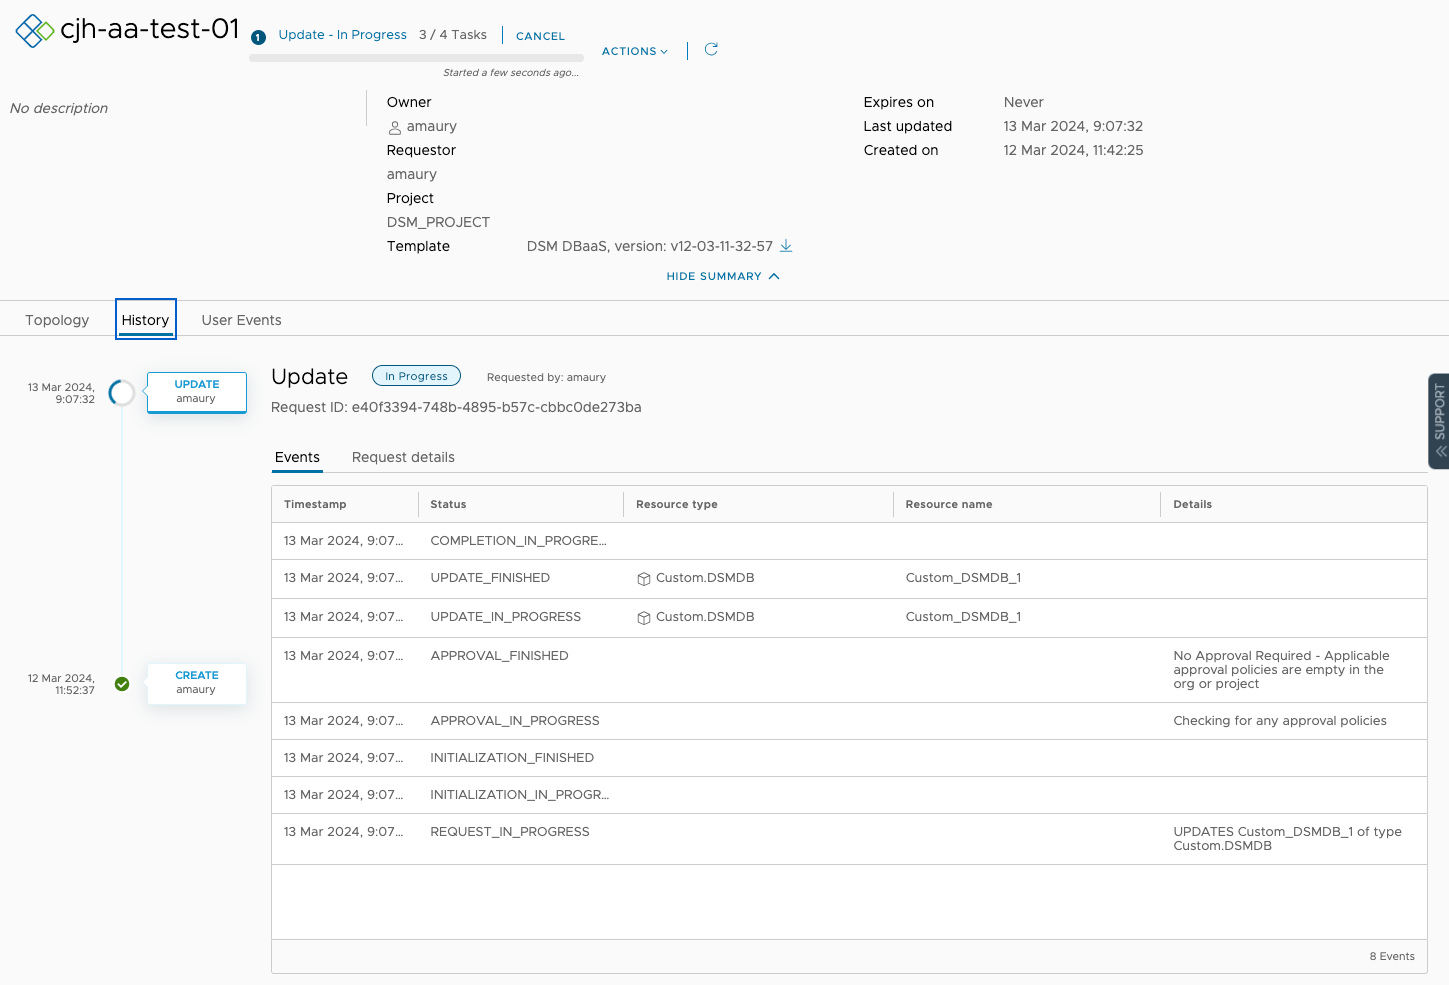
If I decided that I wanted to add availability to a database in addition to what vSphere HA offers, it is possible to change it from standalone to replicated (e.g., from 1 node to 3 node). To do this, simply modify the topology of the database after selecting Update and submit it. The progress of the update can be monitored from Deployment > History view below:
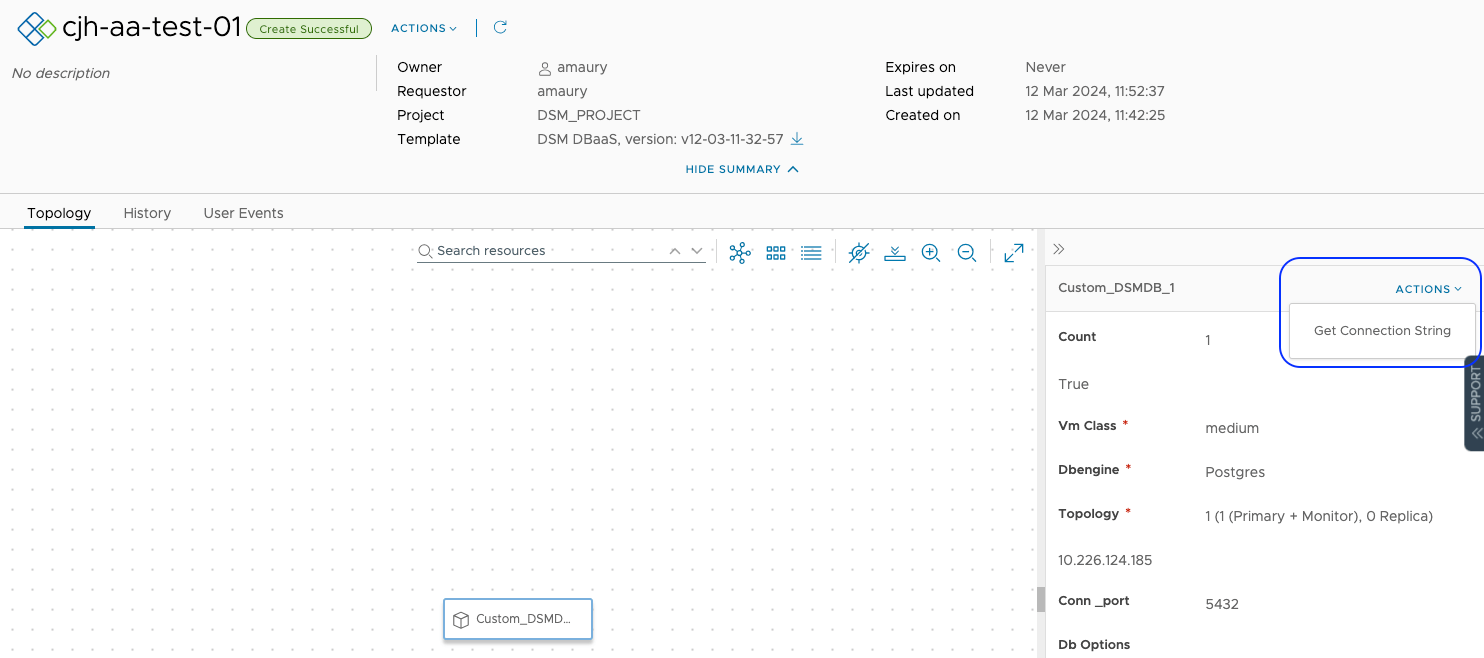
There is another important operation to consider after provisioning the database, and that is how to connect to the database. This is not possible to retrieve from the DSM UI for databases deployed via Aria Automation as a security precaution. Instead, the database connection string can only be retrieved directly from Aria Automation if the database has been provisioned via Aria Automation. To get the connection string to connect to the database, go to Deployment and under Topology with the custom resource selected, click on Actions > Get Connection String, as shown below:
Summary
You now have everything to run Database as a Service (DBaaS) through Aria Automation. This integration creates all of the objects necessary in Aria Automation to achieve this. This post shows the default settings, but the code provided could be used as a template to meet your own DBaaS requirements. You could, for example, only allow certain users to see and consume certain infrastructure policies rather than give them visibility to all policies. Another scenario could be to have every database automatically backed up by always setting that option to true in the request. Similarly, if you wanted to make every PostgreSQL database highly available, you could mask out the topology option from the user and always deploy a databases with a replicated topology. Tune the deployment to meet your own organisational needs. Hopefully this post has shown you the value of DSM, and also the value of integrating DSM with Aria Automation to offer a DBaaS on vSphere/VCF infrastructure. Thank you for reading.
One Reply to “Data Services Manager v2.0.2 available with new Aria Automation Integration”