
![]()
Note: This procedure is using a non-release version of the product. Thus, some of the screenshots may change before GA. However the deployment steps should remain the same.
Step 1 – Create a Namespace
vSphere with Tanzu continues to support the concept of a namespace. It enables a vSphere administrator to control the resources that are available for a developer or team of developers when they are working on a vSphere with Tanzu deployment. This avoids developers “running wild” and consuming more than their fair share of underlying infrastructure resources and impacting other developers or teams of developers working on the same infrastructure, or indeed, impacting production. To get started, in Workload Management, select Namespaces and then click on “Create Namespace“, as shown below.

When creating a namespace, you will need to select the cluster on which the namespace is being created. Since I only have a single cluster, that is quite straight-forward. You will need to provide the name for the namespace – in my case, I called it cormac-ns. Lastly, and this is something new, you will need to select a workload network. If you remember the previous post on enabling workload management, we had the ability to create multiple workload networks. I only created one at the time, so again this step is easy. Once the optional description has been added, click on the “Create” button.

All going well, the namespace will get created, similar to what is shown below:

Note that the Tanzu Kubernetes window shows that the namespace already has a Content Library associated with it. This was done when we included a Content Library during the deployment of vSphere with Tanzu / Workload Management previously. I am not doing anything with Permissions – I will use my SSO administrator login later, which implicitly has full permissions on the namespace already. I am not going to do anything with Capacity and Usage settings – you would certainly want to review and perhaps tune these settings in a production environment. The only step I need to add is the addition of a Storage Policy to the Storage section. I am going to add the “vSAN Default Storage Policy”. Note that any Storage Policy that is added to the Namespace appears as a Kubernetes Storage Class which can then be used when provisioning Persistent Volumes. We will see this Storage Class later on when we login to vSphere with Tanzu and build the TKG “guest” cluster.

Once the storage class is selected, it will be visible in the Storage section of the namespace landing page in the vSphere UI.

Everything is now in place to deploy the TKG cluster.
Step 2 – Login to vSphere with Tanzu and deploy a TKG
When we initially deployed vSphere with Tanzu, I showed you the Kubernetes CLI Tools landing page. This is accessible by connecting to the Load Balancer IP address of the Supervisor Control Plane Kubernetes API server. In fact, there is also a link to this URL in the Status window of the Namespace as well. From this page, we can download various tools such as kubectl and kubectl-login to access a namespace and deploy a TKG.
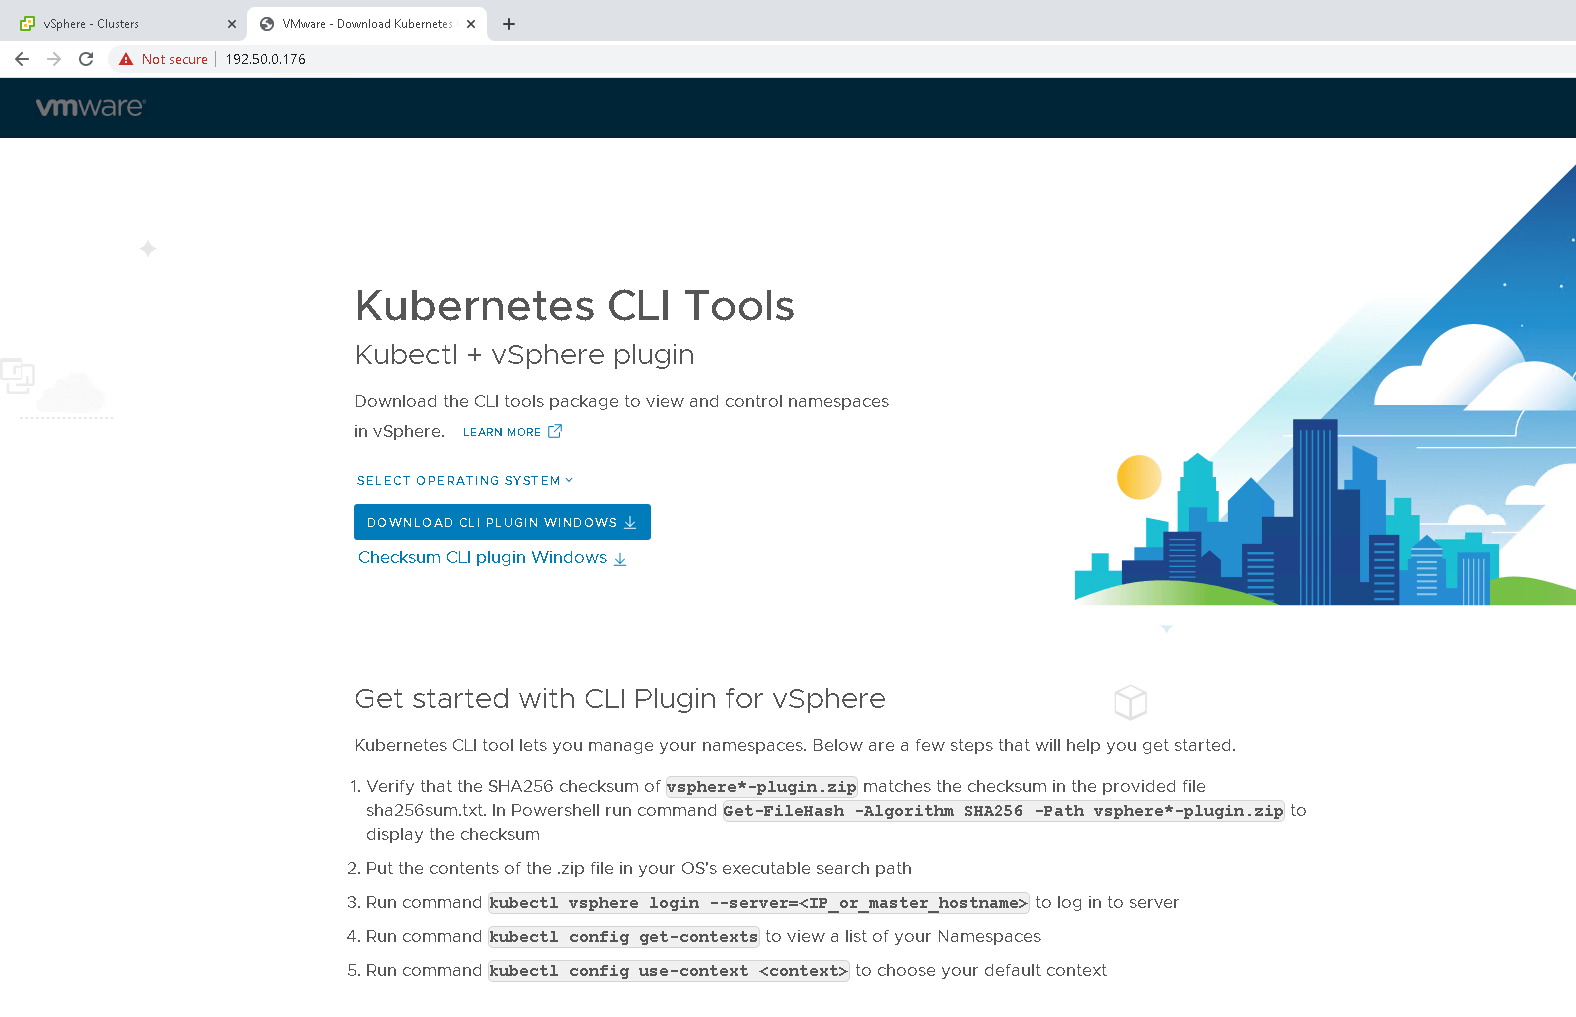
I will use these tools to login to the cormac-ns namespace created earlier, and deploy out a TKG – a Tanzu Kubernetes cluster.
2.1 Login to the namespace context
To login, use the kubectl-login command and set the server to the Supervisor Control Plane API Server IP address.
C:\bin>kubectl-vsphere.exe login --insecure-skip-tls-verify --vsphere-username \
administrator@vsphere.local --server=https://192.50.0.176
Password:********
Logged in successfully.

You have access to the following contexts:
   192.50.0.176
   cormac-ns

If the context you wish to use is not in this list, you may need to try
logging in again later, or contact your cluster administrator.


To change context, use `kubectl config use-context <workload name>`

C:\bin>kubectl config use-context cormac-ns
Switched to context "cormac-ns".
2.2 Verify Control Plane and Storage Class
At this point, I always like to check that the 3 control plane nodes are in a ready state, and that the storage policy that we assigned to the namespace earlier has indeed appeared as a storage class. One other item that is useful to verify is that the TKG virtual machine images are visible and that the content library used for storing the images has indeed synchronized successfully. It looks like everything is present and correct.
C:\bin>kubectl get nodes
NAME                               STATUS   ROLES    AGE   VERSION
422425ad85759a5db789ec2120747d13   Ready    master   18m   v1.18.2-6+38ac483e736488
42242c84f294f9c38ecfe419ca601c6e   Ready    master   19m   v1.18.2-6+38ac483e736488
42249f93e32ea81ca8f03efa2465d67f   Ready    master   28m   v1.18.2-6+38ac483e736488


C:>kubectl get sc
NAME                          PROVISIONER              RECLAIMPOLICY   VOLUMEBINDINGMODE   ALLOWVOLUMEEXPANSION   AGE
vsan-default-storage-policy   csi.vsphere.vmware.com   Delete          Immediate           true                   57s


C:\bin>kubectl get virtualmachineimages
NAME                                                         VERSION                           OSTYPE
ob-15957779-photon-3-k8s-v1.16.8---vmware.1-tkg.3.60d2ffd    v1.16.8+vmware.1-tkg.3.60d2ffd    vmwarePhoton64Guest
ob-16466772-photon-3-k8s-v1.17.7---vmware.1-tkg.1.154236c    v1.17.7+vmware.1-tkg.1.154236c    vmwarePhoton64Guest
ob-16545581-photon-3-k8s-v1.16.12---vmware.1-tkg.1.da7afe7   v1.16.12+vmware.1-tkg.1.da7afe7   vmwarePhoton64Guest
ob-16551547-photon-3-k8s-v1.17.8---vmware.1-tkg.1.5417466    v1.17.8+vmware.1-tkg.1.5417466    vmwarePhoton64Guest
2.3 Create a manifest file for the TKG deployment
Creating TKG “guest” clusters in vSphere with Tanzu is really simple. All one needs is a simple manifest file in YAML detailing information about the name of the cluster, the number of control plane nodes, the number of worker nodes, the size of the nodes from a resource perspective (class), which storage class to use (storageClass) and which image to use for the nodes (version). Here is an example that I used, specifying a single control plane node, 2 x worker nodes, and to use image version 1.17.7. This use of version number is a shorthand way of specifying which Photon OS image to use from the content library listing previously. Note that only v1.17.x images contain the Antrea CNI.
C:\bin>type cluster.yaml
apiVersion: run.tanzu.vmware.com/v1alpha1
kind: TanzuKubernetesCluster
metadata:
  name: tkg-cluster-01
spec:
  topology:
    controlPlane:
      count: 1
      class: guaranteed-small
      storageClass: vsan-default-storage-policy
    workers:
      count: 2
      class: guaranteed-small
      storageClass: vsan-default-storage-policy
  distribution:
    version: v1.17.7
Note the indentation. It needs to be just right for the manifest to work. If you are interested in learning more about the resources assigned to the various classes, you can use the following commands to query it. Note the ‘Spec‘ details at the bottom of the describe output.
C:\bin>kubectl get virtualmachineclass
NAME                  AGE
best-effort-2xlarge   2d16h
best-effort-4xlarge   2d16h
best-effort-8xlarge   2d16h
best-effort-large     2d16h
best-effort-medium    2d16h
best-effort-small     2d16h
best-effort-xlarge    2d16h
best-effort-xsmall    2d16h
guaranteed-2xlarge    2d16h
guaranteed-4xlarge    2d16h
guaranteed-8xlarge    2d16h
guaranteed-large      2d16h
guaranteed-medium     2d16h
guaranteed-small      2d16h
guaranteed-xlarge     2d16h
guaranteed-xsmall     2d16h


C:\bin>kubectl describe virtualmachineclass guaranteed-small
Name:         guaranteed-small
Namespace:
Labels:       <none>
Annotations:  API Version:  vmoperator.vmware.com/v1alpha1
Kind:         VirtualMachineClass
Metadata:
  Creation Timestamp:  2020-09-25T15:25:56Z
  Generation:          1
  Managed Fields:
    API Version:  vmoperator.vmware.com/v1alpha1
    Fields Type:  FieldsV1
    fieldsV1:
      f:metadata:
        f:annotations:
          .:
          f:kubectl.kubernetes.io/last-applied-configuration:
      f:spec:
        .:
        f:hardware:
          .:
          f:cpus:
          f:memory:
        f:policies:
          .:
          f:resources:
            .:
            f:requests:
              .:
              f:cpu:
              f:memory:
    Manager:         kubectl
    Operation:       Update
    Time:            2020-09-25T15:25:56Z
  Resource Version:  2939
  Self Link:         /apis/vmoperator.vmware.com/v1alpha1/virtualmachineclasses/guaranteed-small
  UID:               4a547922-0ecf-4899-a8b8-12cc6dbd78e8
Spec:
  Hardware:
    Cpus:    2
    Memory:  4Gi
  Policies:
    Resources:
      Requests:
        Cpu:     2000m
        Memory:  4Gi
Events:          <none>
Note: If you use a home lab with a small or even nested environment, it might be better to use a best-effort-small rather than a guaranteed-small for the guest cluster, as it won’t require as many resources. Simply edit the cluster.yaml appropriately and make the change for the worker and controlPlane class entries.
Having the “Requests” values for CPU and Memory match the “Spec.Hardware” entries means that these resources are guaranteed, rather than a best efforts. Of course, as we have seen earlier, best efforts is also available as a virtual machine class.
2.4 Apply the TKG manifest, and monitor the deployment
At this point, we can go ahead and deploy the TKG cluster by applying the manifest shown earlier. We can then use a variety of commands to monitor the deployment. The describe commands can be very long, so I will only show the output from when the cluster has been deployed, but you can obviously use the describe command repeatedly to monitor the TKG cluster deployment status.
C:\bin>kubectl apply -f cluster.yaml
tanzukubernetescluster.run.tanzu.vmware.com/tkg-cluster-01 created


C:\bin>kubectl get cluster
NAME             PHASE
tkg-cluster-01   Provisioned


C:\bin>kubectl get tanzukubernetescluster
NAME             CONTROL PLANE   WORKER   DISTRIBUTION                     AGE    PHASE
tkg-cluster-01   1               2        v1.17.7+vmware.1-tkg.1.154236c   3m7s   creating
Here is the complete output from a describe command. Lots of useful information, such as the use of Antrea as the CNI, node and VM status, Cluster API endpoint (from our load balancer, frontend network range of IP addresses)
C:\bin>kubectl describe tanzukubernetescluster
Name:         tkg-cluster-01
Namespace:    cormac-ns
Labels:       <none>
Annotations:  API Version:  run.tanzu.vmware.com/v1alpha1
Kind:         TanzuKubernetesCluster
Metadata:
  Creation Timestamp:  2020-09-23T15:41:25Z
  Finalizers:
    tanzukubernetescluster.run.tanzu.vmware.com
  Generation:  1
  Managed Fields:
    API Version:  run.tanzu.vmware.com/v1alpha1
    Fields Type:  FieldsV1
    fieldsV1:
      f:metadata:
        f:annotations:
          .:
          f:kubectl.kubernetes.io/last-applied-configuration:
      f:spec:
        .:
        f:distribution:
          .:
          f:version:
        f:topology:
          .:
          f:controlPlane:
            .:
            f:class:
            f:count:
            f:storageClass:
          f:workers:
            .:
            f:class:
            f:count:
            f:storageClass:
    Manager:      kubectl
    Operation:    Update
    Time:         2020-09-23T15:41:25Z
    API Version:  run.tanzu.vmware.com/v1alpha1
    Fields Type:  FieldsV1
    fieldsV1:
      f:metadata:
        f:finalizers:
          .:
          v:"tanzukubernetescluster.run.tanzu.vmware.com":
      f:status:
        .:
        f:addons:
          .:
          f:authsvc:
            .:
            f:name:
            f:status:
            f:version:
          f:cloudprovider:
            .:
            f:name:
            f:status:
            f:version:
          f:cni:
            .:
            f:name:
            f:status:
            f:version:
          f:csi:
            .:
            f:name:
            f:status:
            f:version:
          f:dns:
            .:
            f:name:
            f:status:
            f:version:
          f:proxy:
            .:
            f:name:
            f:status:
            f:version:
          f:psp:
            .:
            f:name:
            f:status:
            f:version:
        f:clusterApiStatus:
          .:
          f:apiEndpoints:
          f:phase:
        f:nodeStatus:
          .:
          f:tkg-cluster-01-control-plane-sn85m:
          f:tkg-cluster-01-workers-csjd7-554668c497-vtf68:
          f:tkg-cluster-01-workers-csjd7-554668c497-z8vjt:
        f:phase:
        f:vmStatus:
          .:
          f:tkg-cluster-01-control-plane-sn85m:
          f:tkg-cluster-01-workers-csjd7-554668c497-vtf68:
          f:tkg-cluster-01-workers-csjd7-554668c497-z8vjt:
    Manager:         manager
    Operation:       Update
    Time:            2020-09-23T15:52:45Z
  Resource Version:  22469
  Self Link:         /apis/run.tanzu.vmware.com/v1alpha1/namespaces/cormac-ns/tanzukubernetesclusters/tkg-cluster-01
  UID:               9ede742d-c7e3-4715-ac7e-89d2ed312a16
Spec:
  Distribution:
    Full Version:  v1.17.7+vmware.1-tkg.1.154236c
    Version:       v1.17.7
  Settings:
    Network:
      Cni:
        Name:  antrea
      Pods:
        Cidr Blocks:
          192.168.0.0/16
      Service Domain:  cluster.local
      Services:
        Cidr Blocks:
          10.96.0.0/12
  Topology:
    Control Plane:
      Class:          guaranteed-small
      Count:          1
      Storage Class:  vsan-default-storage-policy
    Workers:
      Class:          guaranteed-small
      Count:          2
      Storage Class:  vsan-default-storage-policy
Status:
  Addons:
    Authsvc:
      Name:     authsvc
      Status:   applied
      Version:  0.1-65-ge3d8be8
    Cloudprovider:
      Name:     vmware-guest-cluster
      Status:   applied
      Version:  0.1-77-g5875817
    Cni:
      Name:     antrea
      Status:   applied
      Version:  v0.7.2_vmware.1
    Csi:
      Name:     pvcsi
      Status:   applied
      Version:  v0.0.1.alpha+vmware.73-4a26ce0
    Dns:
      Name:     CoreDNS
      Status:   applied
      Version:  v1.6.5_vmware.5
    Proxy:
      Name:     kube-proxy
      Status:   applied
      Version:  1.17.7+vmware.1
    Psp:
      Name:     defaultpsp
      Status:   applied
      Version:  v1.17.7+vmware.1-tkg.1.154236c
  Cluster API Status:
    API Endpoints:
      Host:  192.50.0.177
      Port:  6443

    Phase:   Provisioned
  Node Status:
    tkg-cluster-01-control-plane-sn85m:             ready
    tkg-cluster-01-workers-csjd7-554668c497-vtf68:  ready
    tkg-cluster-01-workers-csjd7-554668c497-z8vjt:  ready
  Phase:                                            running
  Vm Status:
    tkg-cluster-01-control-plane-sn85m:             ready
    tkg-cluster-01-workers-csjd7-554668c497-vtf68:  ready
    tkg-cluster-01-workers-csjd7-554668c497-z8vjt:  ready
Events:                                             <none>


C:\bin>kubectl get tanzukubernetescluster
NAME             CONTROL PLANE   WORKER   DISTRIBUTION                     AGE   PHASE
tkg-cluster-01   1               2        v1.17.7+vmware.1-tkg.1.154236c   11m   running


C:\bin>kubectl get cluster
NAME             PHASE
tkg-cluster-01   Provisioned
Of interest is the API Endpoints, which is another IP address from the range of Load Balancer IP addresses. From a networking perspective, our deployment now looks something similar to the following:

One last thing to notice is that if we switch back to the vSphere Client UI, and examine the namespace we can now see that there is an update in the Tanzu Kubernetes window showing one cluster deployed. And if you look to the left at the inventory, you can also see the TKG cluster as an inventory item in vSphere:

2.5 Logout, then login to TKG cluster context
All of the above was carried out in the context of a namespace in the vSphere with Tanzu Supervisor cluster. The next step is to logout from the Supervisor context, and login to the TKG guest cluster context. This allows us to direct kubectl commands at the TKG cluster API server, rather than the Kubernetes API server in the Supervisor cluster. There are other ways to achieve this through setting a KUBECONFIG environment variable, but I find it easier to simply logout and login again.
C:\bin>kubectl-vsphere.exe logout
Your KUBECONFIG context has changed.
The current KUBECONFIG context is unset.
To change context, use `kubectl config use-context <workload name>`
Logged out of all vSphere namespaces.

C:\bin>kubectl-vsphere.exe login \
--insecure-skip-tls-verify \
--vsphere-username administrator@vsphere.local \
--server=https://192.50.0.176 \
--tanzu-kubernetes-cluster-namespace cormac-ns \
--tanzu-kubernetes-cluster-name tkg-cluster-01
Password: ********
Logged in successfully.

You have access to the following contexts:
   192.50.0.176
   cormac-ns
   tkg-cluster-01

If the context you wish to use is not in this list, you may need to try
logging in again later, or contact your cluster administrator.

To change context, use `kubectl config use-context <workload name>`
2.6 Validate TKG cluster context
C:\bin>kubectl get nodes
NAME                                            STATUS   ROLES    AGE     VERSION
tkg-cluster-01-control-plane-sn85m              Ready    master   8m40s   v1.17.7+vmware.1
tkg-cluster-01-workers-csjd7-554668c497-vtf68   Ready    <none>   2m16s   v1.17.7+vmware.1
tkg-cluster-01-workers-csjd7-554668c497-z8vjt   Ready    <none>   2m16s   v1.17.7+vmware.1


C:\bin>kubectl get pods -A
NAMESPACE                      NAME                                                         READY   STATUS    RESTARTS   AGE
kube-system                    antrea-agent-7zphw                                           2/2     Running   0          2m23s
kube-system                    antrea-agent-mvczg                                           2/2     Running   0          2m23s
kube-system                    antrea-agent-t6qgc                                           2/2     Running   0          8m11s
kube-system                    antrea-controller-76c76c7b7c-4cwtm                           1/1     Running   0          8m11s
kube-system                    coredns-6c78df586f-6d77q                                     1/1     Running   0          7m55s
kube-system                    coredns-6c78df586f-c8rtj                                     1/1     Running   0          8m14s
kube-system                    etcd-tkg-cluster-01-control-plane-sn85m                      1/1     Running   0          7m24s
kube-system                    kube-apiserver-tkg-cluster-01-control-plane-sn85m            1/1     Running   0          7m12s
kube-system                    kube-controller-manager-tkg-cluster-01-control-plane-sn85m   1/1     Running   0          7m30s
kube-system                    kube-proxy-frpgn                                             1/1     Running   0          2m23s
kube-system                    kube-proxy-lchkq                                             1/1     Running   0          2m23s
kube-system                    kube-proxy-m2xjn                                             1/1     Running   0          8m14s
kube-system                    kube-scheduler-tkg-cluster-01-control-plane-sn85m            1/1     Running   0          7m27s
vmware-system-auth             guest-cluster-auth-svc-lf2nf                                 1/1     Running   0          8m2s
vmware-system-cloud-provider   guest-cluster-cloud-provider-7788f74548-cfng4                1/1     Running   0          8m13s
vmware-system-csi              vsphere-csi-controller-574cfd4569-kfdz8                      6/6     Running   0          8m12s
vmware-system-csi              vsphere-csi-node-hvzpg                                       3/3     Running   0          8m12s
vmware-system-csi              vsphere-csi-node-t4w8p                                       3/3     Running   0          2m23s
vmware-system-csi              vsphere-csi-node-t6rdw                                       3/3     Running   0          2m23s
Looks good. We have successfully deploy a TKG guest cluster in vSphere with Tanzu.
Summary
Over the last number of blog posts we have seen the following:
- How vSphere with Tanzu is different to VCF with Tanzu, including network requirements. We also looked at the various prerequisites required to successfully deploy vSphere with Tanzu.
- We looked at how to deploy the HA-Proxy, and how it provides load balancer services for vSphere with Tanzu.
- We saw how to enable workload management, and stand up vSphere with Tanzu.
- And finally, in this post, we saw how to deploy a TKG ‘guest’ cluster in vSphere with Tanzu.
Hopefully this has given you enough information to go and review vSphere with Tanzu in your own vSphere environment. I am always interested in hearing your feedback – what works, what doesn’t work, etc. Feel free to leave a comment or reach out to me on social media.
Happy Tanzu’ing.