
![]()
Prerequisites Revisited
The prerequisites were covered in detail in the “Getting started” post, and you won’t have been able to successfully deploy the HA-Proxy without following them. There are two prerequisites which are required when enabling workload management, so let’s revisit those. First, make sure that you have the appropriate storage policy for the Supervisor control plane VMs created, and, second, ensure that a Content Library with the TKG images subscription URL in place. Navigate to Workload Management in the vSphere Client UI and click on Get Started, as shown below:

The first requirement is to select a networking stack. Whilst you can continue to use NSX-T with vSphere with Tanzu, we are going to go with the vCenter Server Network, meaning we will be using a vSphere Distributed Switch (VDS). Remember however, as pointed out in previous posts, use of the vCenter Server Network (VDS + HA-Proxy) precludes you from using the PodVM service.

Next, select the cluster on which you wish to install vSphere with Tanzu. I have only one cluster in my environment, so that is the only option available.

Now you need to select a control plane size. I don’t really have any advice to offer here on how to size the control plane at this point. My guess is that this will come in official documentation. I chose small, as I don’t plan to do much other than deploy a simple TKG cluster or two. Resource details are shown against each size.

Next, select a storage policy for the control plane disks. Since I use vSAN for the underlying datastore, I am simply selecting the vSAN default policy from the drop-down list of policies:

Next up is to step to configure the Load Balancer on the Frontend network. This is where we tell vSphere with Tanzu about HA-Proxy. Note that the Name should be very simple (don’t use any special characters). Type is obviously HA Proxy. The Data path API address is the IP address of the HA Proxy on the management network plus the Dataplane API management port (default 5556) so in my setup this was 10.27.51.134:5556. User name and password are what was provided when we provisioned the HA Proxy previously. The IP address Ranges for Virtual Servers is the range of Load Balancer IP addresses we provided when configuring the HA-Proxy – 192.50.0.176/29 – which provides 8 load balancer IP addresses ranging from 192.50.0.176-192.50.0.183. Note you must provide the range and not a CIDR in this case. Lastly we need the Server Certificate Authority. This can be found by SSH’ing as root to the HA-Proxy appliance, and copying the contents of the /etc/haproxy/ca.crt file to here. Note however that I have inadvertently used the /etc/haproxy/server.crt as well, and this has seemed to have worked as well. However, I’ve been informed that it is preferable to use the ca.crt, since that is the CA that was used to sign the actual certificate (server.crt) that the DataPlane API endpoint on HAProxy will serve.

Now we setup the Management network. These are the IP addresses that will be used by the Supervisor Control Plane VMs. You will need to provide a starting IP address, but you should provide a minimum of 4. A 3 node Supervisor control plane will requires at least this many. However, it would be useful to make sure there are even more IP addresses available in the range for the purpose of patching, upgrades, etc. Official documentation should provide guidance on this. The rest of the fields here, such as NTP, DNS and Gateway, are self-explanatory.

The final network that needs to be configured is the Workload network. This network is used by both the Supervisor control plane nodes and the TKG “guest” cluster nodes. You will notice that the Supervisor control plane nodes get a second network interface plumbed up, connecting them to the portgroup of the workload network. On completion of the setup, the Supervisor control plane VMs should have network interfaces on both the management network and the workload network.
The IP address range for Services can be left at the default, but you will need to click the ADD button to add the workload network. Select the portgroup for the workload network, provide gateway, subnet mask and a range of IP addresses that can be used for the network. I provided a range of 16 free IP addresses.

There is the option to create additional workload networks, but I am only creating one.Once saved, the workload network should look something like this.

Next, select the Content Library that holds the TKG images. This should have already been created, as it was called out in the prerequisites. In my setup, I called the Content Library Kubernetes. This needs to be synchronized to the TKG image subscription URL – https://wp-content.vmware.com/v2/latest/lib.json. This Content Library will automatically be available in the vSphere with Tanzu Namespaces that we will create later, once vSphere with Tanzu is up and running. If you are setting up vSphere with Tanzu in an air-gapped/dark site, there is a documented procedure on how to setup the Content Library in an Air-Gapped environment.

Finally everything is in place to start enabling workload management / vSphere with Tanzu. Click the Finish button.

You should now observe that the cluster starts to configure:

A lot of configuration steps now start to take place, such as deploying the Supervisor cluster control plane VMs, and plumbing them up onto both the management network and the workload network. The control plane API server should also get a load balancer IP address allocated from the configured range of IP addresses on the frontend network. If you want to trace the log output for a deployment, SSH onto the vCenter server, navigate to /var/log/vmware/wcp and run a tail -f wcpsvc.log. Note that this generates a lot of logging, but might be useful in identifying the root cause of a failure. If the deployment completes successfully, you should see the Control Plane IP address configured with one of the Load Balancer / frontend IP address range. In fact, in my case, it is the first IP address in that range – 192.50.0.176.

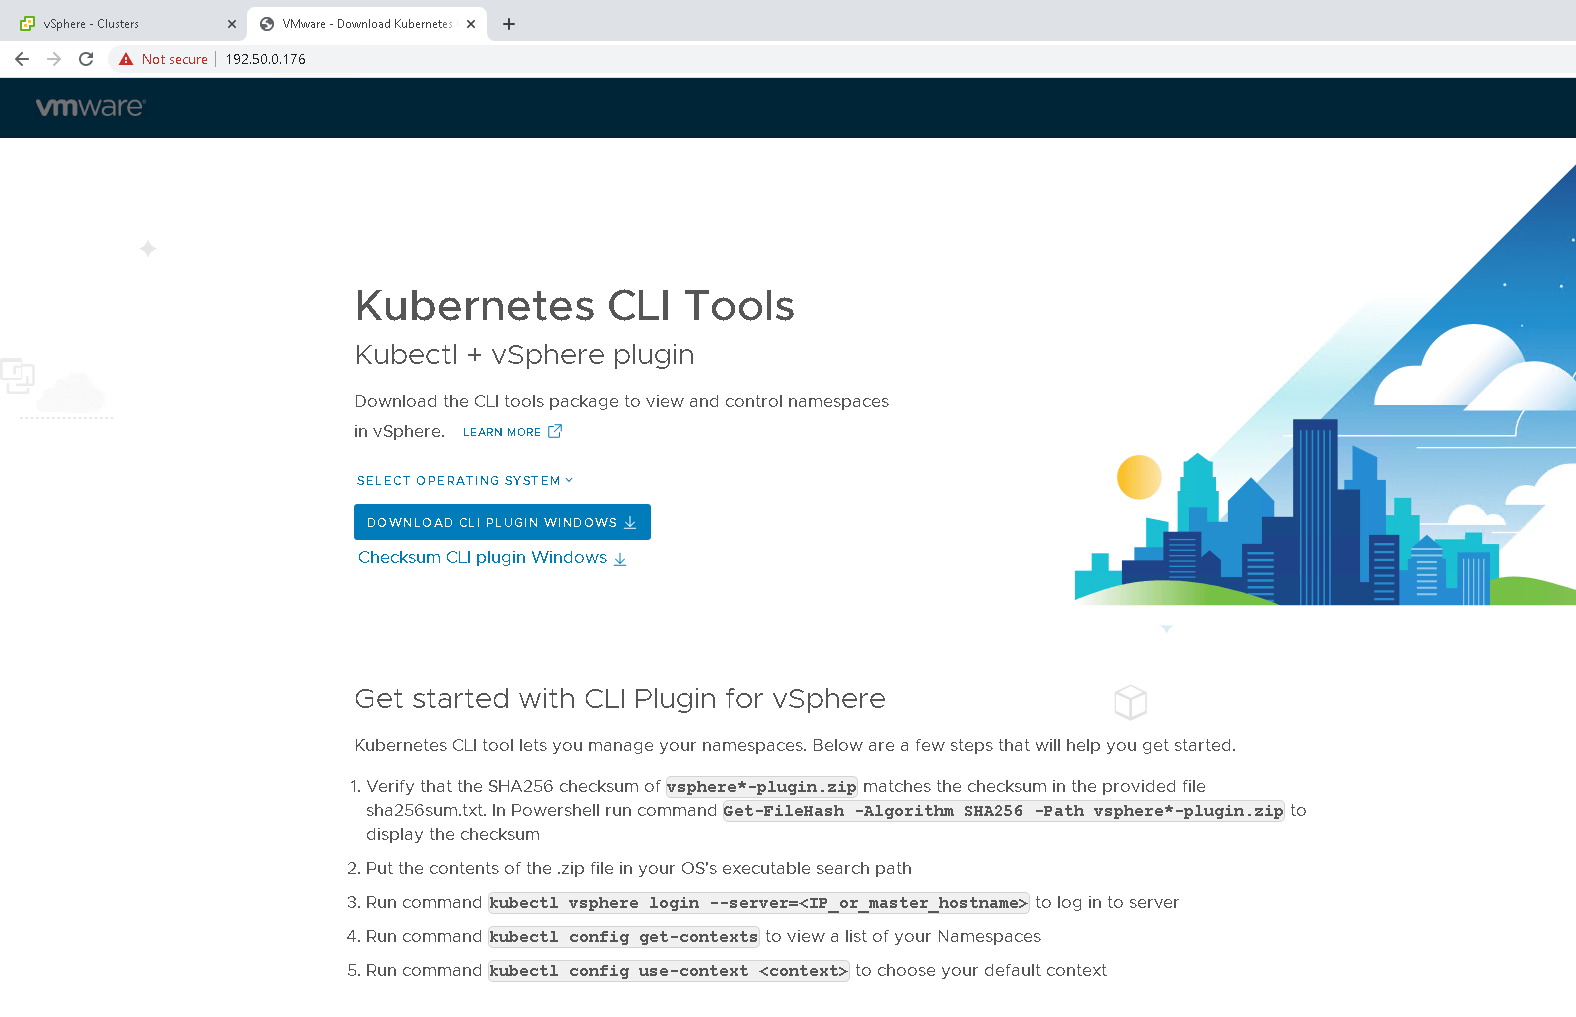
And now you should be able to connect to the Control Plane IP address and see the Kubernetes CLI Tools landing page.
Success! We have deployed vSphere with Tanzu with a HA-Proxy, which has been able to provide a load balancer IP address to our Supervisor cluster control plane. From a networking perspective, this is how my setup looks at the moment, now that the Supervisor control plane (virtual machines SV1-3) has been deployed.

At this point, we have looked at the prerequisites for getting started with vSphere with Tanzu. We have also looked at the deployment of HA-Proxy. In this post, we have covered how to deploy/configure Workload Management/vSphere with Tanzu. In my final post, I will cover the remaining tasks which will include how to create a Namespace, how to login to vSphere with Tanzu and how to deploy a TKG cluster. Stay tuned!